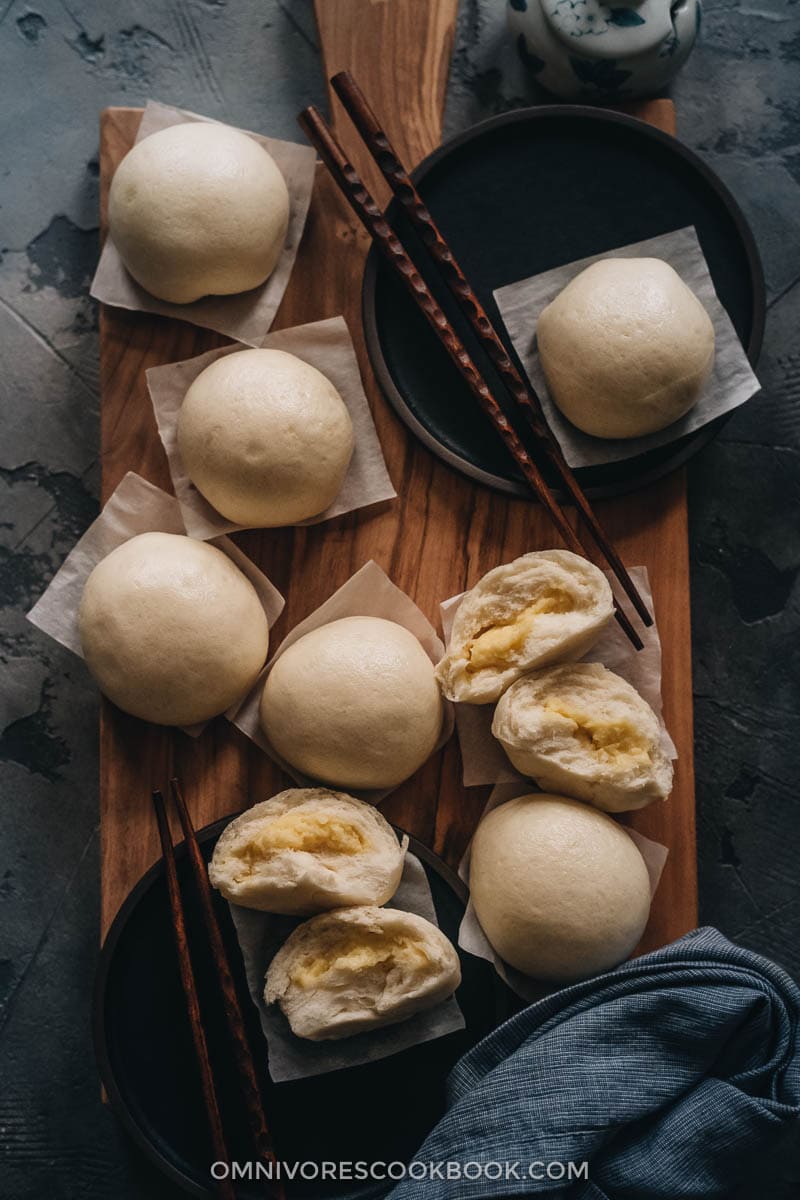
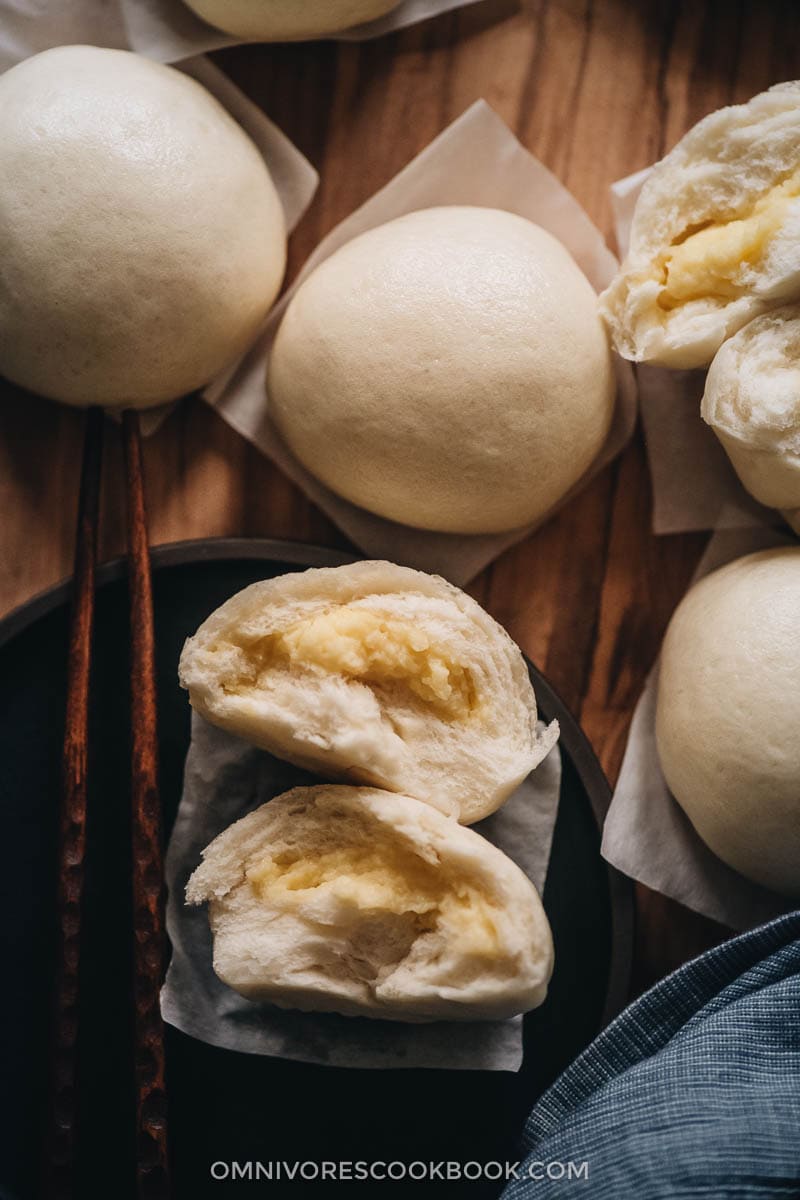
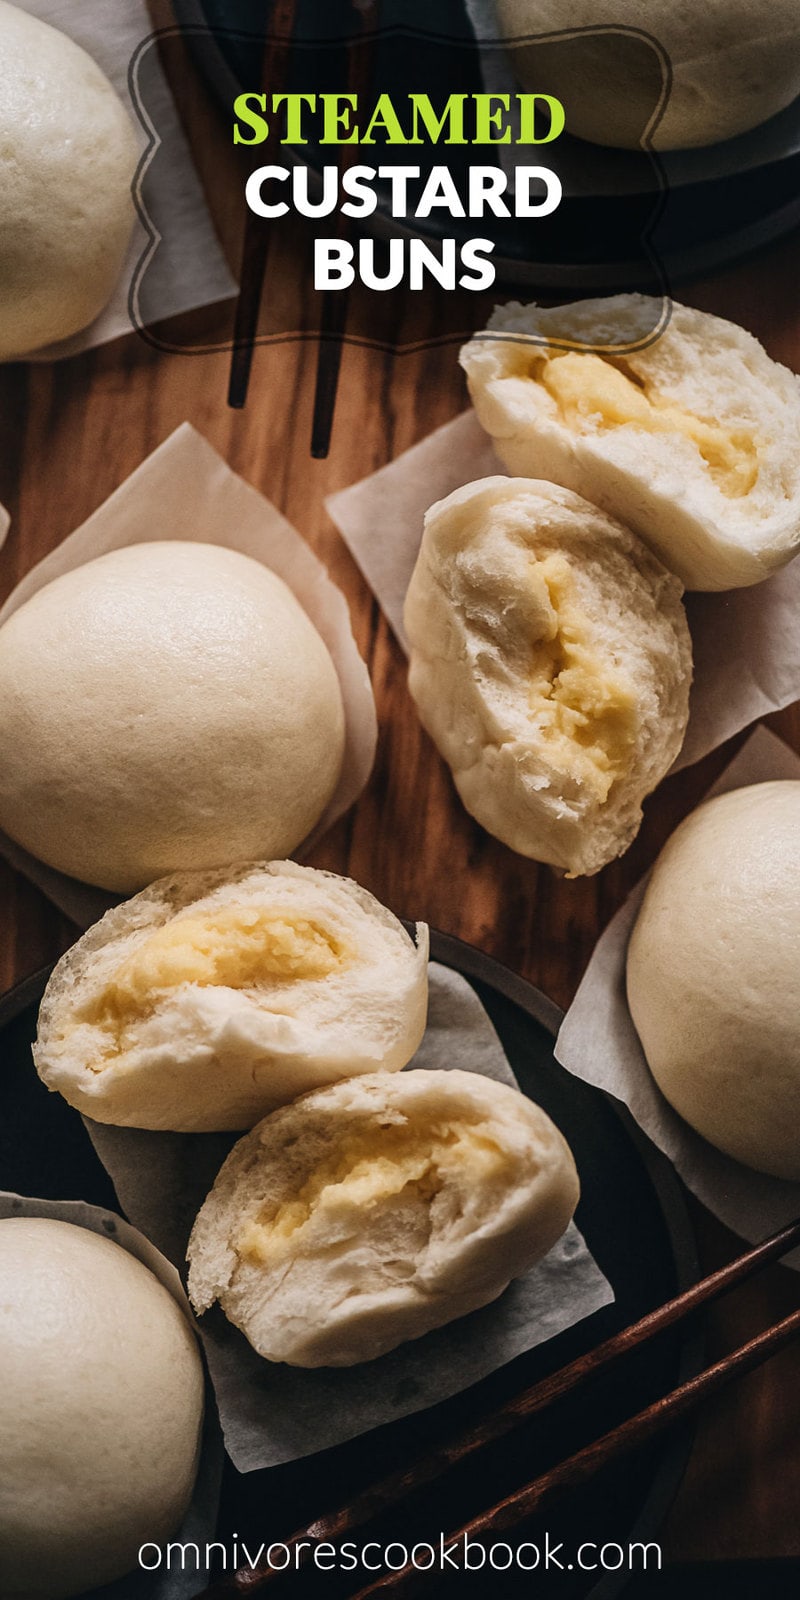
Steamed custard buns are a dim sum classic, but I found them to be a perfect dish for holiday gatherings and parties as well. Made with a yeast dough and steamed, the buns have a super soft and spongy texture with a smooth surface. The custard filling is creamy, fragrant, and sweet. It has a melt-in-your-mouth texture when warm. For me, these custard buns are somewhere between milk bread rolls and cinnamon buns. They are super hearty and just sweet and creamy enough to pass for a dessert. It’s totally proper to serve them as a breakfast item, an afternoon snack with tea, or on your dinner table as a side.
Why this recipe
There are many ways to make steamed custard buns. But to recreate the real-deal dim sum experience, you want a very soft bun with tiny air bubbles and a smooth surface. The filling should be creamy and fragrant. We tested the recipe using different methods and finally chose the one that has the fewest ingredients and the easiest process.
The recipe uses very simple ingredients. You probably already have them in your pantry. The dough is super easy to put together using a kitchen mixer. The recipe produces the real-deal dim sum style steamed custard buns.
Cooking process
I know the recipe looks really long. Because I wanted to cover all the ground and make the cooking process well-documented with plenty of detail, to help you recreate this dim sum classic in your kitchen. But in reality, the active prep and cooking time is quite short and easy. Here is how.
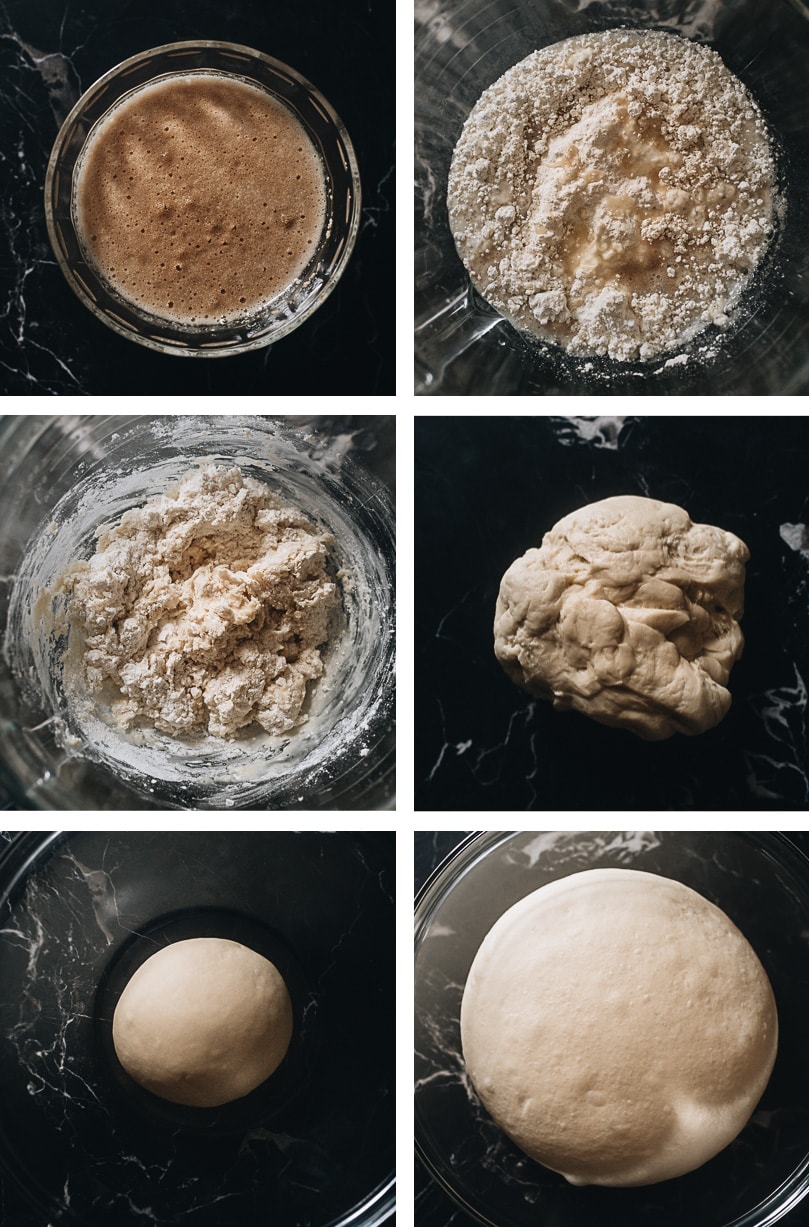
1. Prepare the dough – 1st rise
The recipe starts by activating the yeast. Once done, all you need to do is mix the liquid ingredients with the dry ingredients with a few stirs. Then you can let the mixer do all the heavy lifting. Note, I added the shortening while mixing the dough. It helps the shortening work into the dough and creates a better texture. If you do not want to use a mixer, it’s possible to knead the dough with your hands, especially if you have some bread making experience. You might need to knead the dough a bit longer to achieve a good result. Rest the dough for 2 hours while you work on the filling.
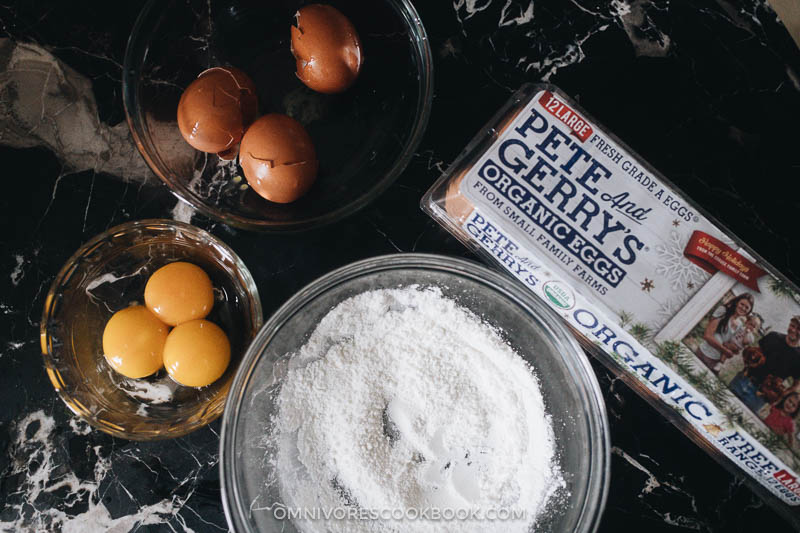
2. Egg quality matters
Because the recipe contains very few ingredients, it’s important to use high quality eggs in this recipe so it yields a fresh and fragrant result. My favorite egg brand is Pete and Gerry’s Organic Eggs. They source fresh, high quality eggs from the small family farms they partner with, and then bring them to your grocery store. Unlike at mass-production facilities run by big corporations, their hens are truly humanely treated and have access to fresh water and grass. As a result, you’ll notice that their egg yolks have a beautiful vibrant yellow color, which holds up well when you separate the eggs and yields a much richer taste. I used just a touch of vanilla and a modest amount of sugar in the recipe, so the egg flavor will come through. I mentioned Pete and Gerry’s eggs in a previous post, if you want to learn more about the brand.
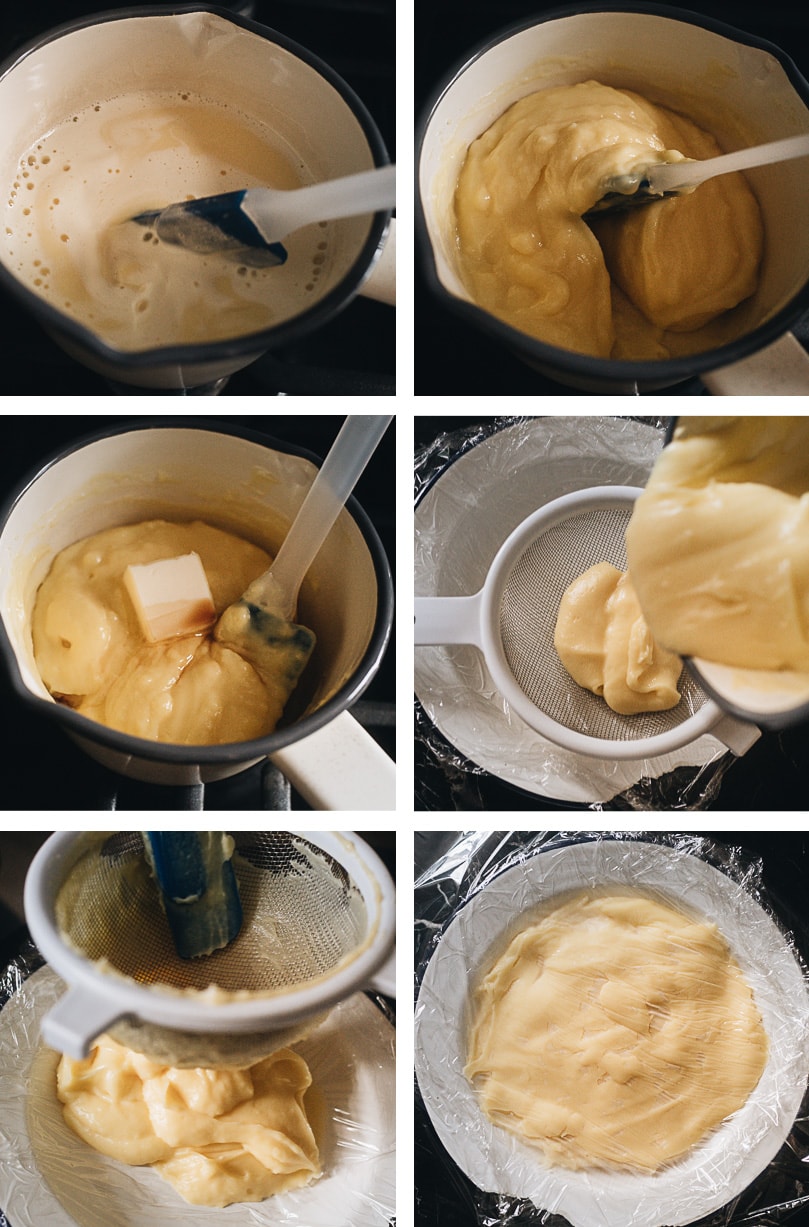
3. Prepare the custard
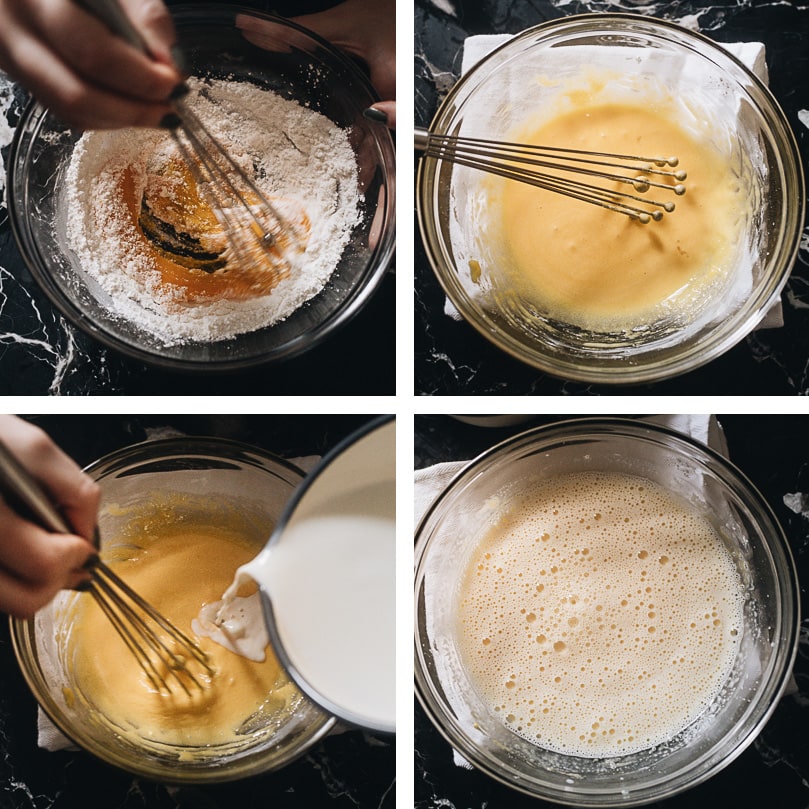
This recipe uses a standard custard recipe as the base. It contains more flour than regular custard so it is easy to form it into the custard filling. The workflow is: (1) Mix the dry ingredients (2) Heat up the milk and half of the sugar until warm (3) Mix the egg yolks with the dry ingredients (4) Add the milk into the egg yolk and flour mixture
(5) Cook the mixture until it thickens (6) Strain the custard for a smooth texture (7) Chill the custard in the fridge
Note:
Make sure you don’t overheat the milk, otherwise it will cook the eggs and make the filling into a lumpy soup. I usually use a thermometer to make sure the milk doesn’t get hotter than 150°F (65°C). If you do not have a thermometer, you should heat up the milk over low heat until it’s warmed up but not too hot if you put your finger into the milk. Do not mix the egg yolks with the dry ingredients before you heat up the milk. The sugar will cook the egg yolk and change its texture if added too early. Stir the custard constantly as you heat it up on the stove. The mixture will be very runny at the beginning and will take a few minutes to cook. But once it starts to thicken, it thickens very quickly, like flipping a switch. Chill the custard completely before forming the buns. The texture will harden and become easier to work with once cooled.
4. Wrapping the buns
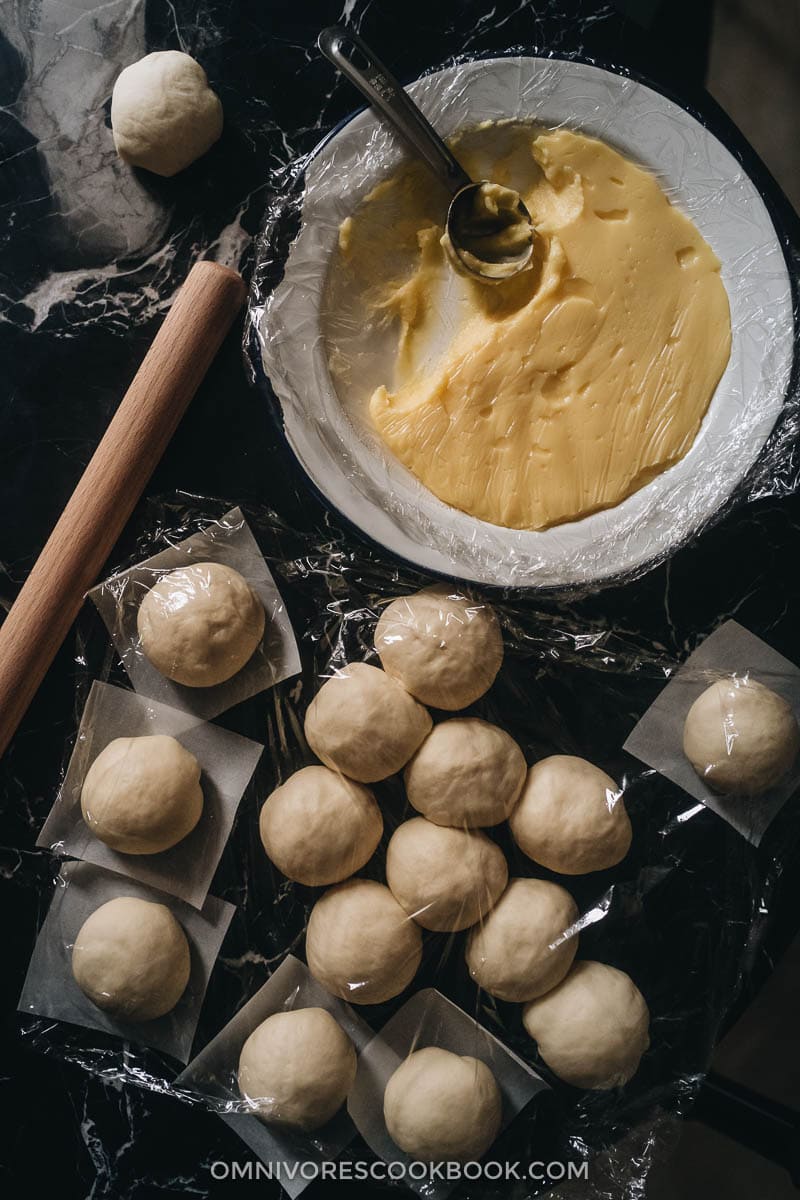
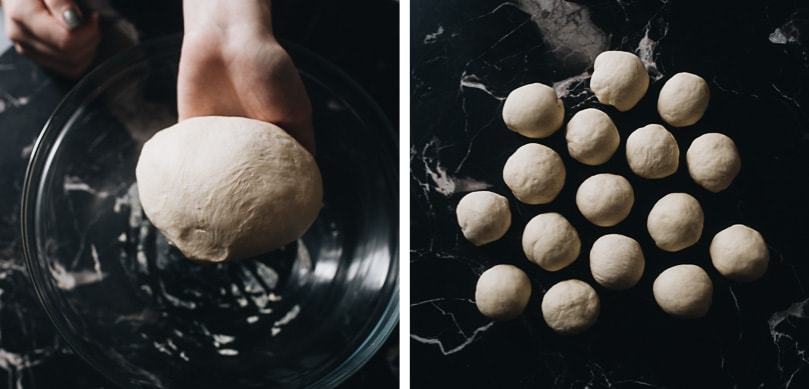
The dough will triple in size once rested, as well as become smooth and soft. You’ll need to punch the dough to squeeze out the air, so the end result will have an even texture. Divide the dough into 16 even pieces. To ensure even baking and consistent size, you can measure out the dough balls with a scale.
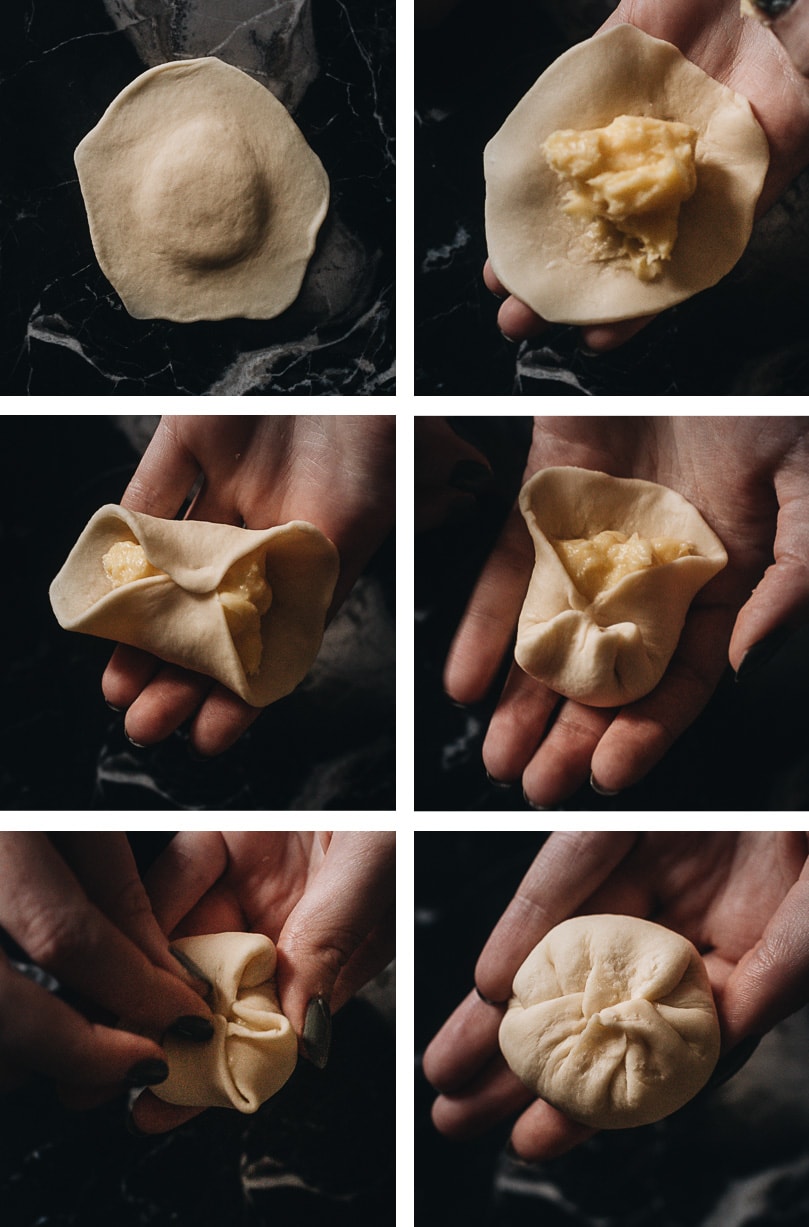
Roll the dough ball into a disk, with a thick center and thin edges. Because when you wrap the bun, it forms pleats. By rolling the edges thin, you will eventually get an even dough texture for the finished buns. It’s quite easy to wrap the buns. Simply pinch the dough together to seal the bun, and place it upside down, so the top of the bun is smooth.
5. 2nd rise & steam
Once you wrap the buns, you’ll need to rest them for another 20 to 30 minutes, so they will rise again and create a fluffy texture. What I recommend doing is to set a stopwatch (a timer works, too) once you finish wrapping the first bun. After 15 minutes, prepare the steamer so the first batch of buns is ready to go. It’s very likely that you’ll need to steam the buns in batches. With this setup, you can steam the first batch while wrapping the rest of the buns. Steam the buns for 10 minutes. Once done, the buns will be soft and fluffy, just like the ones from a dim sum restaurant.
6. Serve & store
You can serve the buns when they’re just out of the steamer. But I usually rest the buns for 10 minutes before serving, so they are not burning hot. These buns are the best when they are hot or warm. But I found them absolutely delicious even when they have cooled to room temperature. The dough holds up well so they will stay soft once cooled. If you don’t plan to serve the buns on the same day of cooking, you should wait until they have cooled completely, transfer them to an airtight container, and store them in the fridge. Try to serve them as soon as possible to get the freshest taste. I do not recommend freezing these buns if you can help it. The custard filling will separate and become a bit watery. The mass-produced custard buns can be stored frozen because they usually contain additives to maintain the texture of the custard.
Afterthought
Dim sum making probably sounds daunting at first, but you’ll find the results extremely rewarding. Next time, no matter whether you’re hosting a dim sum party or simply want to have some fresh bread sitting there for your family to snack on, try out these steamed custard buns. I doubt you’ll ever worry about storing them because they’ll be gone in a second.
More delicious dim sum recipes
Chinese Chive Pockets (Chinese Chive Dumplings) Char Siu (Chinese BBQ Pork) How to Make Chinese Egg Rolls Wonton Soup Authentic Chinese Scallion Pancakes Steamed Ribs in Black Bean Sauce
If you give this recipe a try, let us know! Leave a comment, rate it (once you’ve tried it), and take a picture and tag it @omnivorescookbook and @peteandgerrys on Instagram! I’d love to see what you come up with.